scpmkj@gmail.com
Get A Free Quote


 share
share
1. Boot up/load print files. Turn on the power → "Function Key" → "Load File" → Select the file to be coded → "OK"(wait a few seconds)→ Click the "Print button"(the print button is red at this time, indicating that printing is being carried out)
2. Edit documents. "Function keys" → "Edit file"(wait a few seconds)→ pop-up editing window → If you want to enter text (CN), English (EN), numbers, symbols, click on text → then click on white space → press "Edit" key → Click Clear → Enter the required information (Press the EN key to switch between Chinese and English symbols, and press Caps to switch case)→ "Done" → After adjusting it according to the font and size to be printed, move the information to the middle of the upper and lower white space → "File" → "Save or Save As" → Enter the file name (you can enter Chinese)→ "OK" → "File" → "Exit" Editing is completed.
If you need to modify the file under the original file: "Function key" → "Edit File" → "File" → "Open" → select "File" to modify → "OK".
3. Edit the pictures. "Function keys" → "Edit pictures" →(Insert USB flash drive)(File name must be Arabic numerals) You can directly import from USB flash drive to the printer → "File" → "Open" → Mobile device file → Select file → "OK". (Note: As long as the file name on the USB drive can only be Arabic digits before it can be imported to the machine)
4. Enable screensaver (screen saver can be enabled if printing for a long time)"Function key" → "Enable screensaver" → Click anywhere to cancel screensaver. (You can charge the printer once when screensaver, which will last longer)
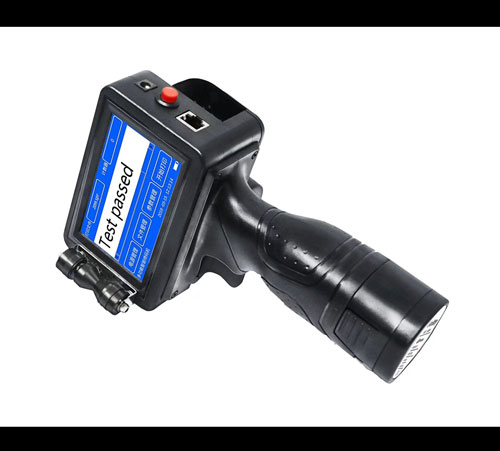
5. Set button.
1. Trigger method: button trigger (generally used for handheld); built-in electric eye (generally used for online);
External electric eye (generally used for non-standard online printing); continuous spray mode (generally used for online timing printing)
2. Inkjet method: (divided into left spray, right spray, and double spray)
3. Print speed: (The larger the print number, the longer the information will be printed; conversely, the smaller the number, the shorter the print will be)
4. Synchronous doubling: Adjust when the synchronization wheel is enabled (the larger the number, the more synchronous it is, and the thicker the font)
5. Print delay: The larger the delay number, the longer the time interval between each piece of information and the information.
6. Print gray scale: The depth of the font can be adjusted. The larger the number, the deeper the word, and the smaller the number, the lighter the light.
7. System settings: printing pulse width (adjusted by 80-120 for quick-drying ink)(adjusted by 130-180 for ordinary ink)
8. Screen calibration: When the screen touch is inaccurate, the screen can be approved once
6. Shut down (first "Stop printing" → then click the "shutdown button" on the screen → then turn off the power switch).
Note: It is strictly prohibited to plug and insert ink cartridges during system startup and printing. If you don't use them for a long time, you can remove and jam them.
Handling common problems: unable to spray words/blurred writing
1. Please check whether the ink cartridge contains ink and whether the ink cartridge is installed;
2. Reload the print file;
3. Whether the battery is sufficient, charging is being sprayed;
4. Check whether the print pulse width is adjusted correctly;
5. Check whether there is any debris on the surface of the nozzle. If you please gently wipe it clean with facial tissue;
6. Check whether other parameters are correct.